

Any links to online stores should be assumed to be affiliates. The company or PR agency provides all or most review samples. They have no control over my content, and I provide my honest opinion.
If you see this review anywhere other than mightygadget.com it has been scraped/stolen
Reolink has released a lot of new cameras in the past year, and I have reviewed many of them. This has led to some of the reviews becoming a bit samey with recent launches offering incremental specification and feature differences from the cameras before them.
The Reolink Duo is something quite different and shows how Reolink is willing to experiment a little with their products to see what works.
They briefly had a product page up for the Reolink Duo as part of their #ReolinkTrial program but all references from it have since disappeared.
The idea of the camera is quite simple, it uses two separate lenses to cover a much wider field of view without relying on a fisheye lens. Each camera is 4MP which then provides a 2560X1440 resolution image. It doesn’t have quite the same vertical resolution as some of their other lower-resolution cameras, such as the RLC-510A, which is 5MP at 2560×1920.
The Reolink Duo then integrates all the other fancy features Reolink has been shoving into their cameras recently. This includes human&car detection, a spotlight for colour night vision and also a speaker/microphone allowing you two-way audio or to set off a siren.
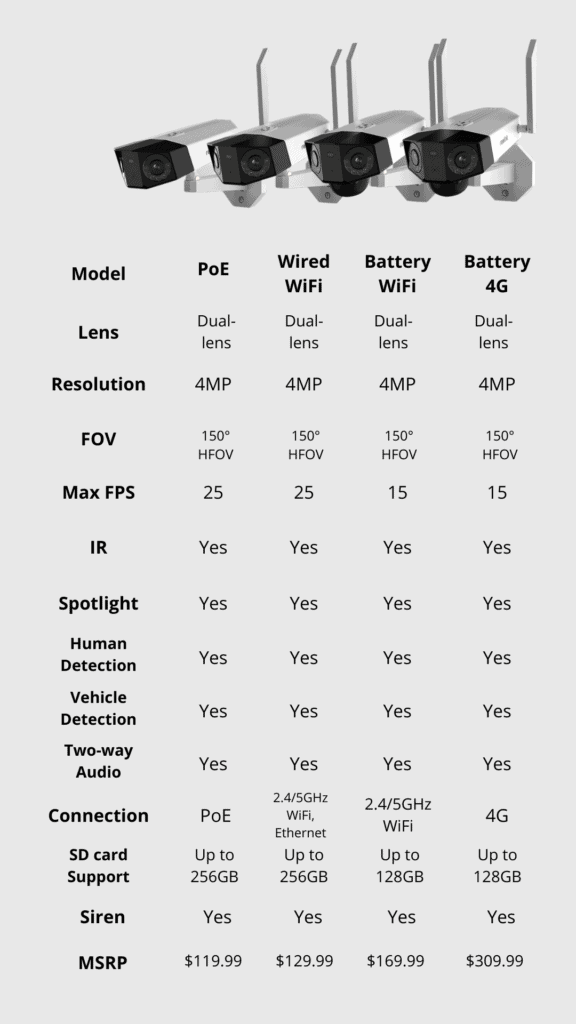
Reolink has now put the pre-launch page live and the camera will officially launch on the 22nd of September. There will be four variants with a PoE, WiFi, battery WiFi and battery 4G model.
Reolink Duo Pre-Launch
Reolink Duo Specification
- Image Sensor: 1/2.7″ CMOS Dual Sensors
- Video Resolution: 2 x 2560X1440 (4.0 Megapixels) at 25 frames/sec
- Lens: f = 4.0 mm fixed, F = 1.6
- Video Format:
- Field of View:
- Horizontal: 150° (total from two lenses)
- Vertical: 44°
- Day & Night: With IR Cut, Auto-switching
- Infrared Night Vision: 30 Meters (LED: 6pcs/20mil/850nm)
- Color Night Vision: Spotlight: 8pcs/4.4W/6500K/440 Lumens
- Audio: two-way audio
- Power:
- IEEE 802.3af, 48V Active
- DC 12.0V⎓1A, <12W
- Ethernet: One 10M/100Mbps RJ45
- Storage: MicroSD card slot (Max. 256GB)
- Audio: Built-in Microphone and Speaker
- Smart Alarm: Motion detection/Human Detection/Vehicle Detection
- Record Mode: Motion Record/Schedule Record (Default: Motion Record)
- Protocols & Standards: HTTPS, SSL, TCP/IP, UDP, HTTP, IPv4, UPnP, RTSP, RTMP, ONVIF, SMTP, NTP, DHCP, DNS, DDNS, FTP, P2P
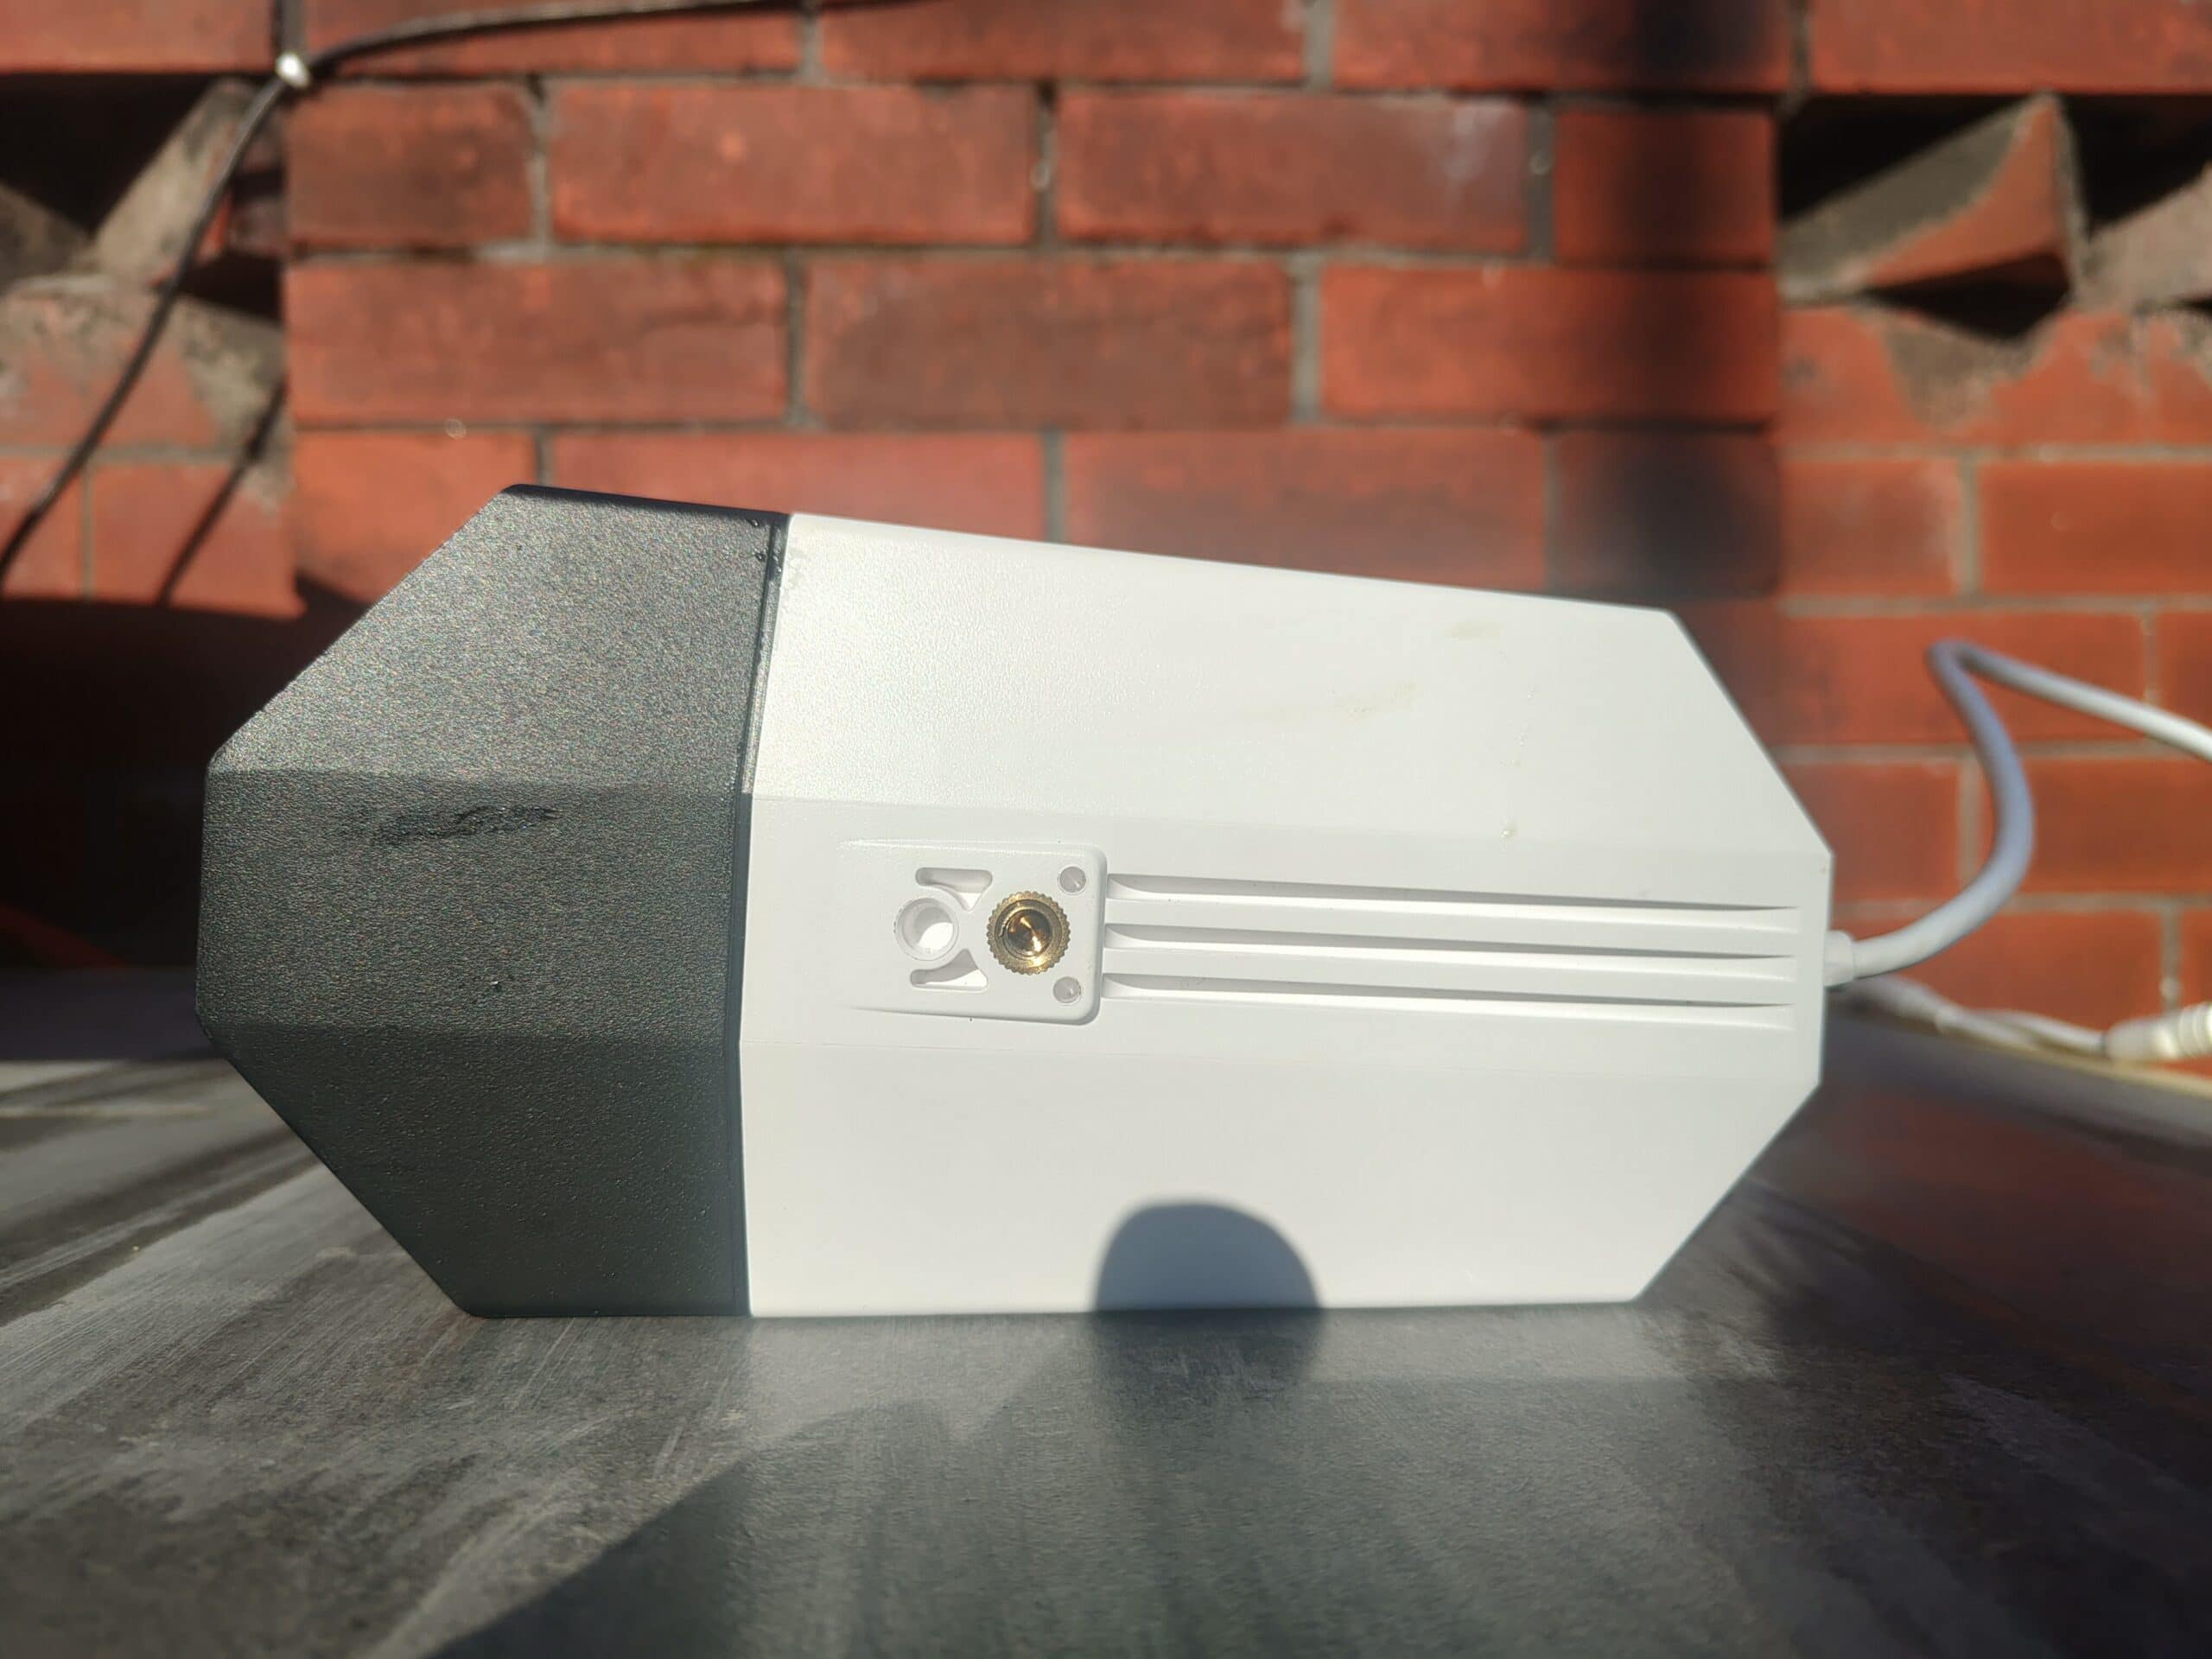
- Dimension: 195x 103x 56 mm
- Weight: 590g
Reolink Duo PoE, WiFi, Battery WiFi and Battery 4G Comparison & Prices
Prices are estimated for now.
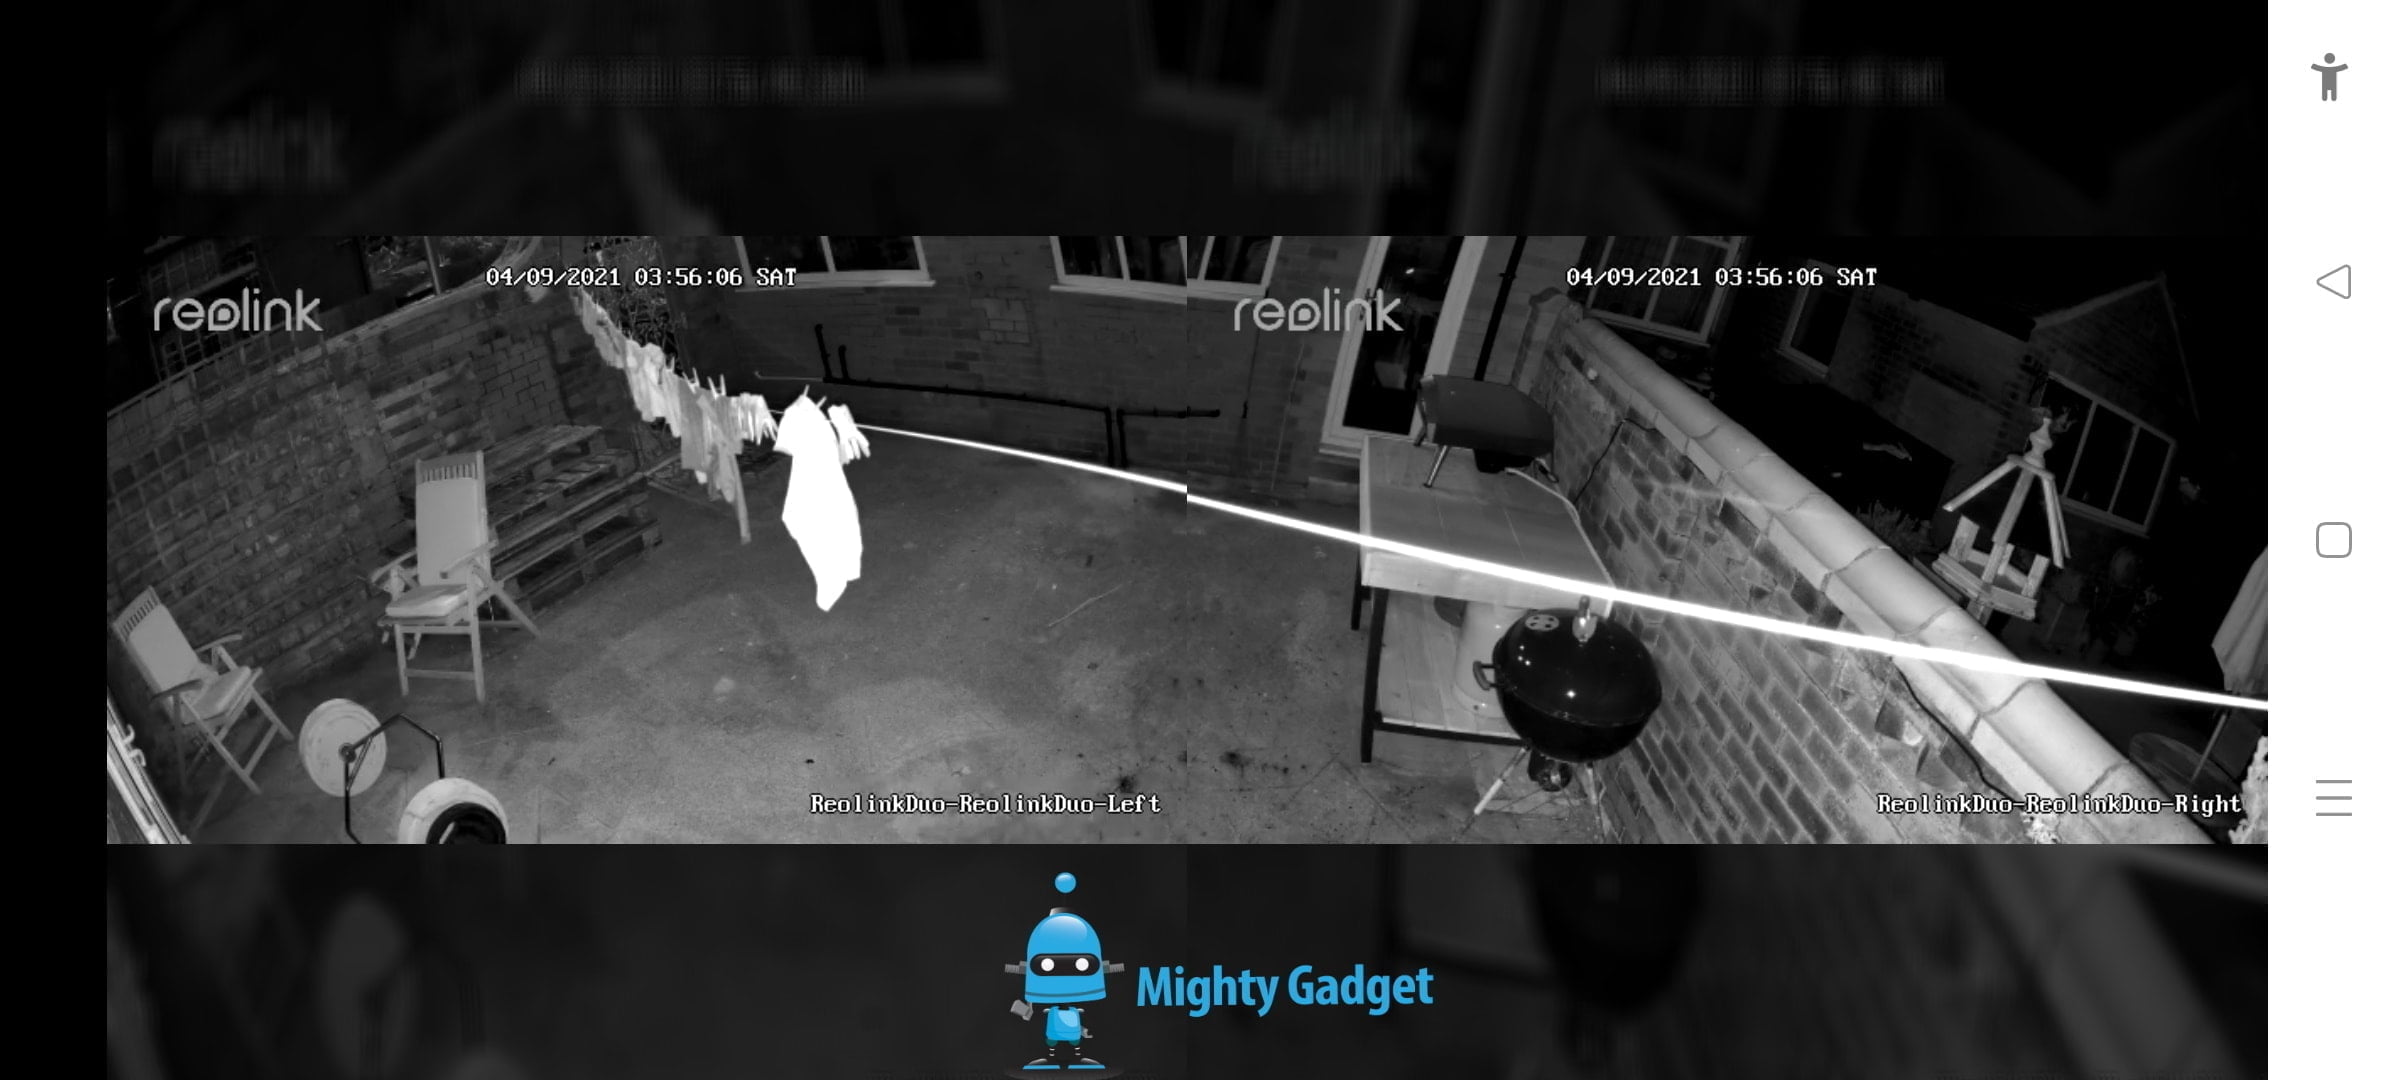
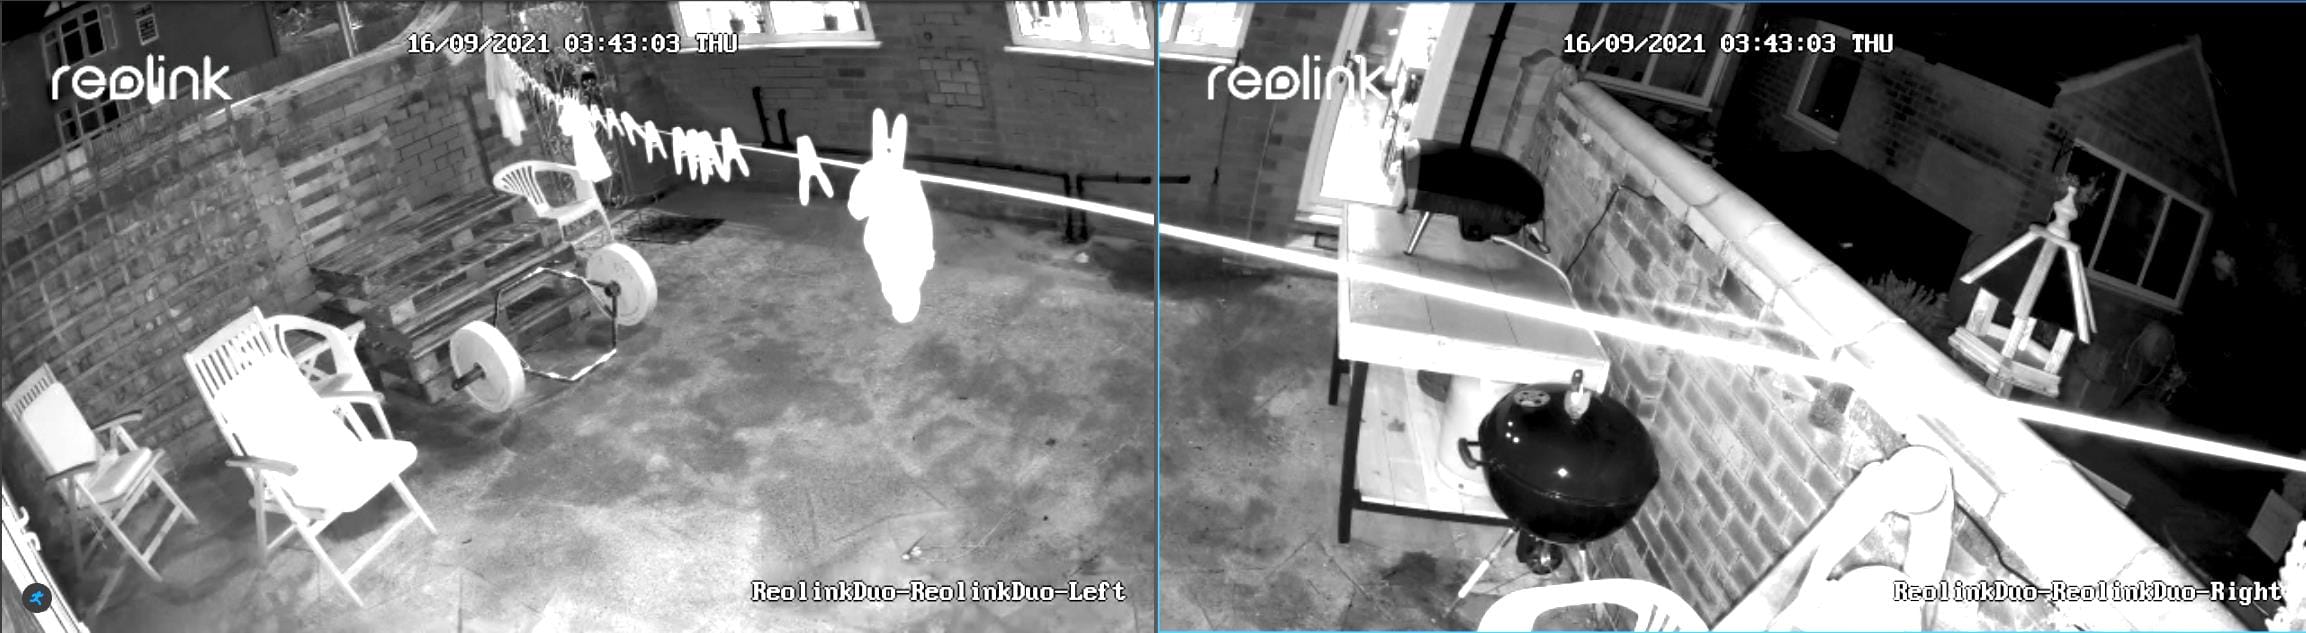
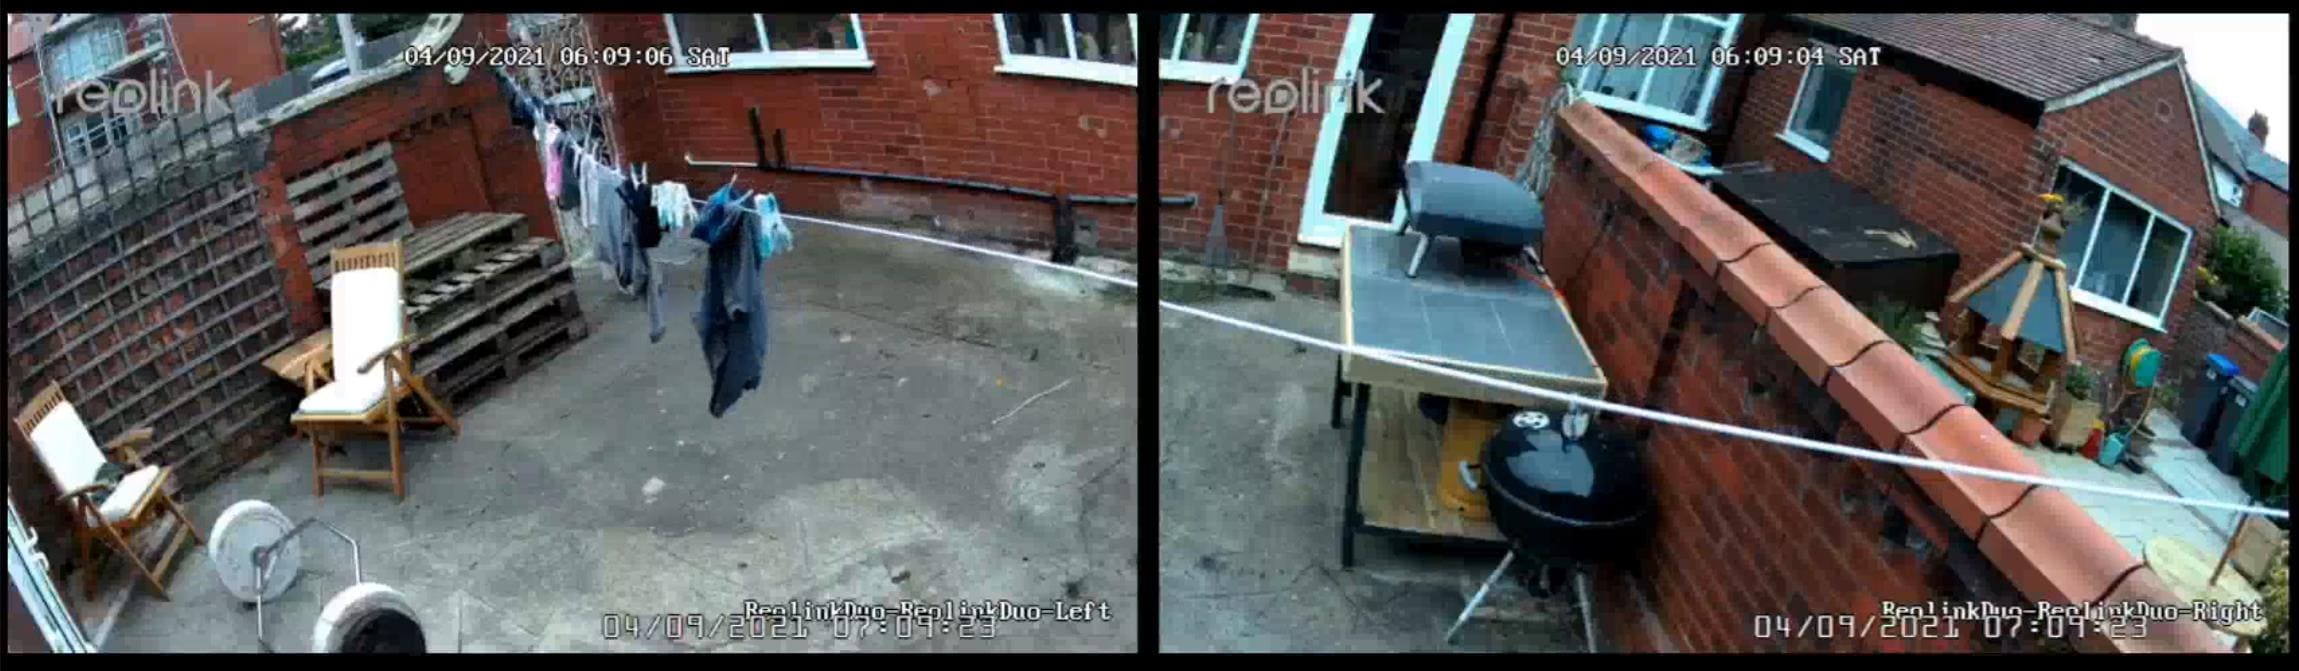
Two separate images rather than image stitching for one ultra-wide panoramic stream
When I was informed of this camera, I had assumed that the two cameras would use seamless image stitching to create one ultra-wide image. Some high-end commercial cameras offer this, with Hikvision having a panoramic stream for some of the multi-directional cameras.
However, Reolink doesn’t do this, and in hindsight, it was perhaps a little over-optimistic to think it would. The Reolink Duo is essentially two separate cameras working in one unit, with each camera supplying a different feed. For the Reolink app and NVR, it will auto add both channels. For ONVIF, you need add two cameras defining the correct channel each.
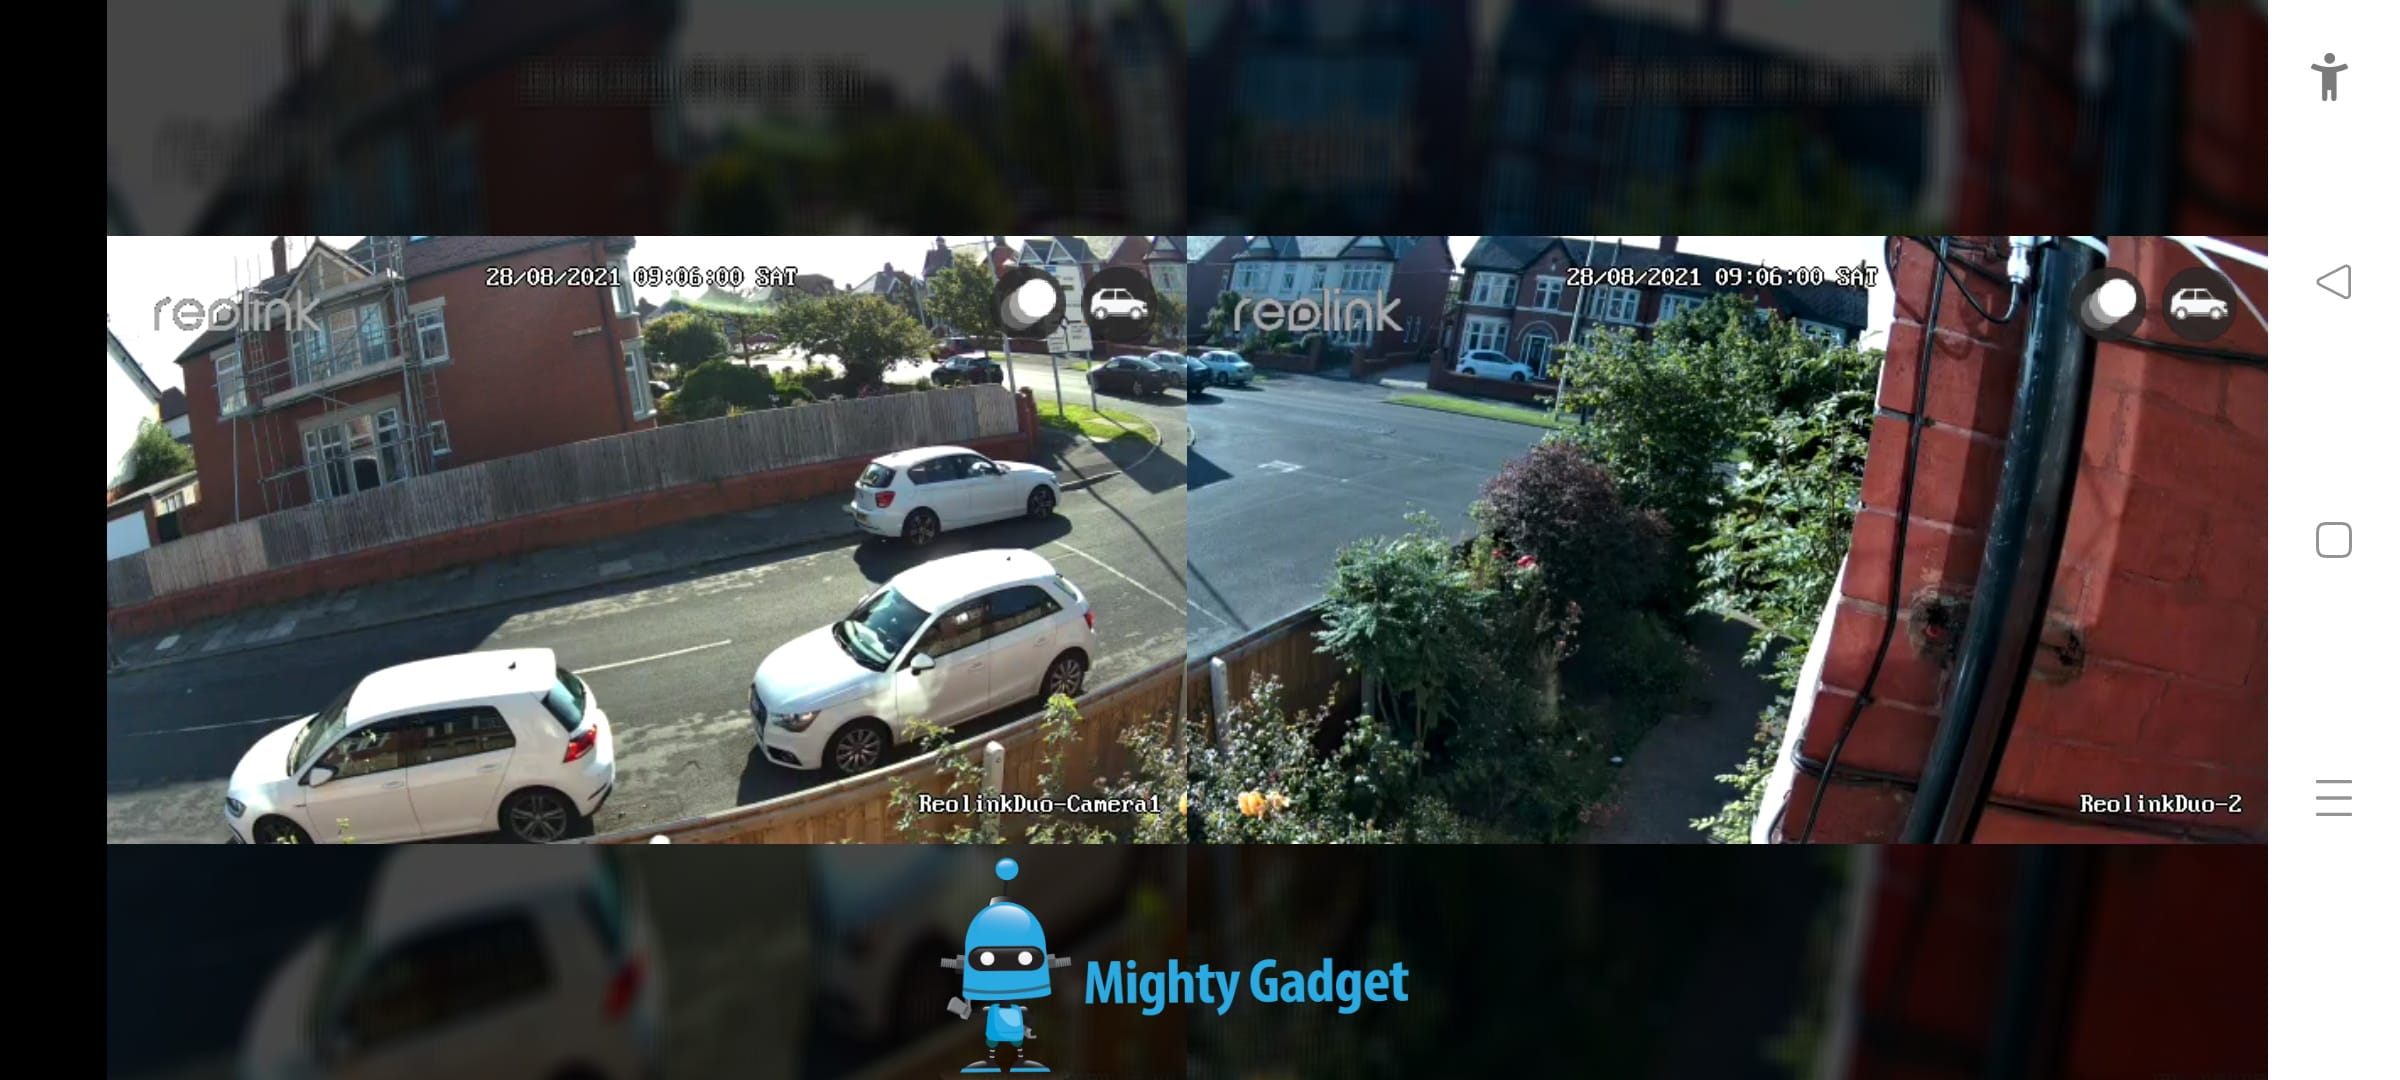
In the Reolink mobile app, you can have it display the feed with the images joined together, and with both the NVR and Blue Iris I have both channels next to each other, so the end result still appears to be stitched together. However, my sample footage is two separate videos for each camera.
Photos
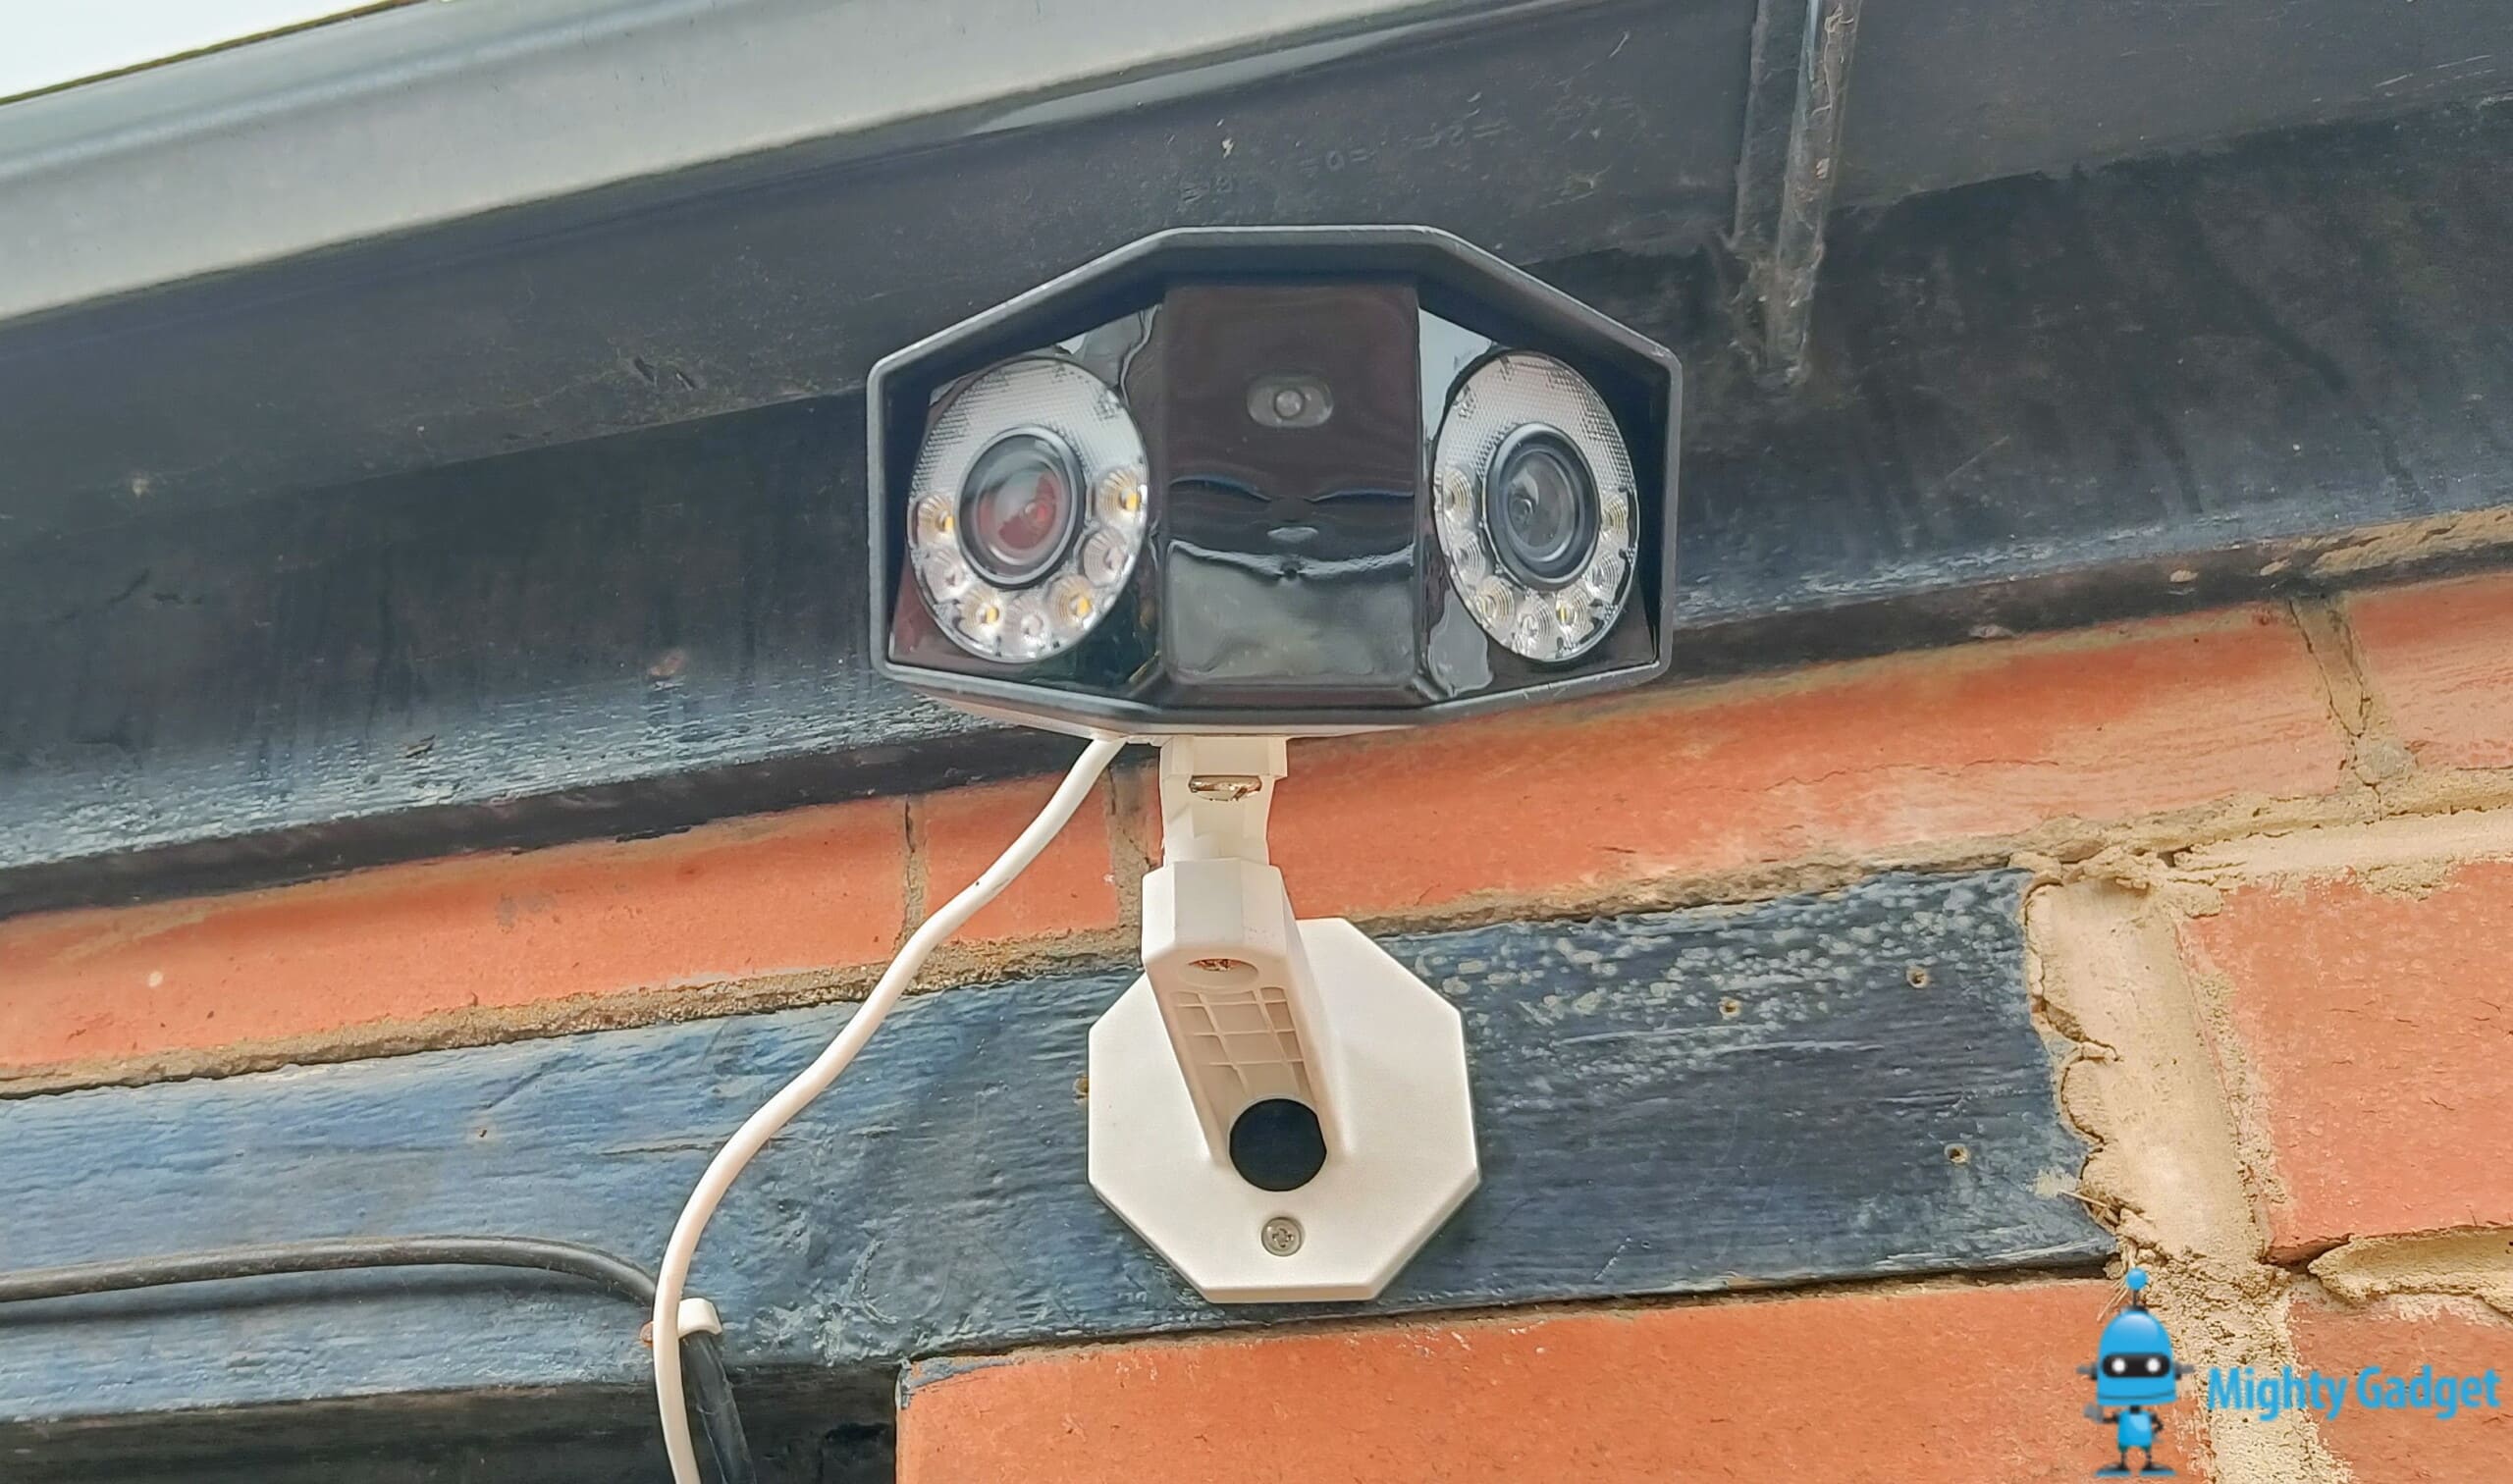
This is quite a different design than your normal Reolink camera or many other brands. It is physically quite large, though smaller than running two cameras side by side.
Installation
I don’t normally bother covering the physical installation, but the design is a little different here. Installation is easy, though. The mount includes a metal backplate that screws into the wall first, the mount then has a single screw point securing it in place. The camera then screws on top.
It feels quite secure, but the main mount is plastic, so it wouldn’t take a great deal of force to damage it, either something falling on it, or malicious.
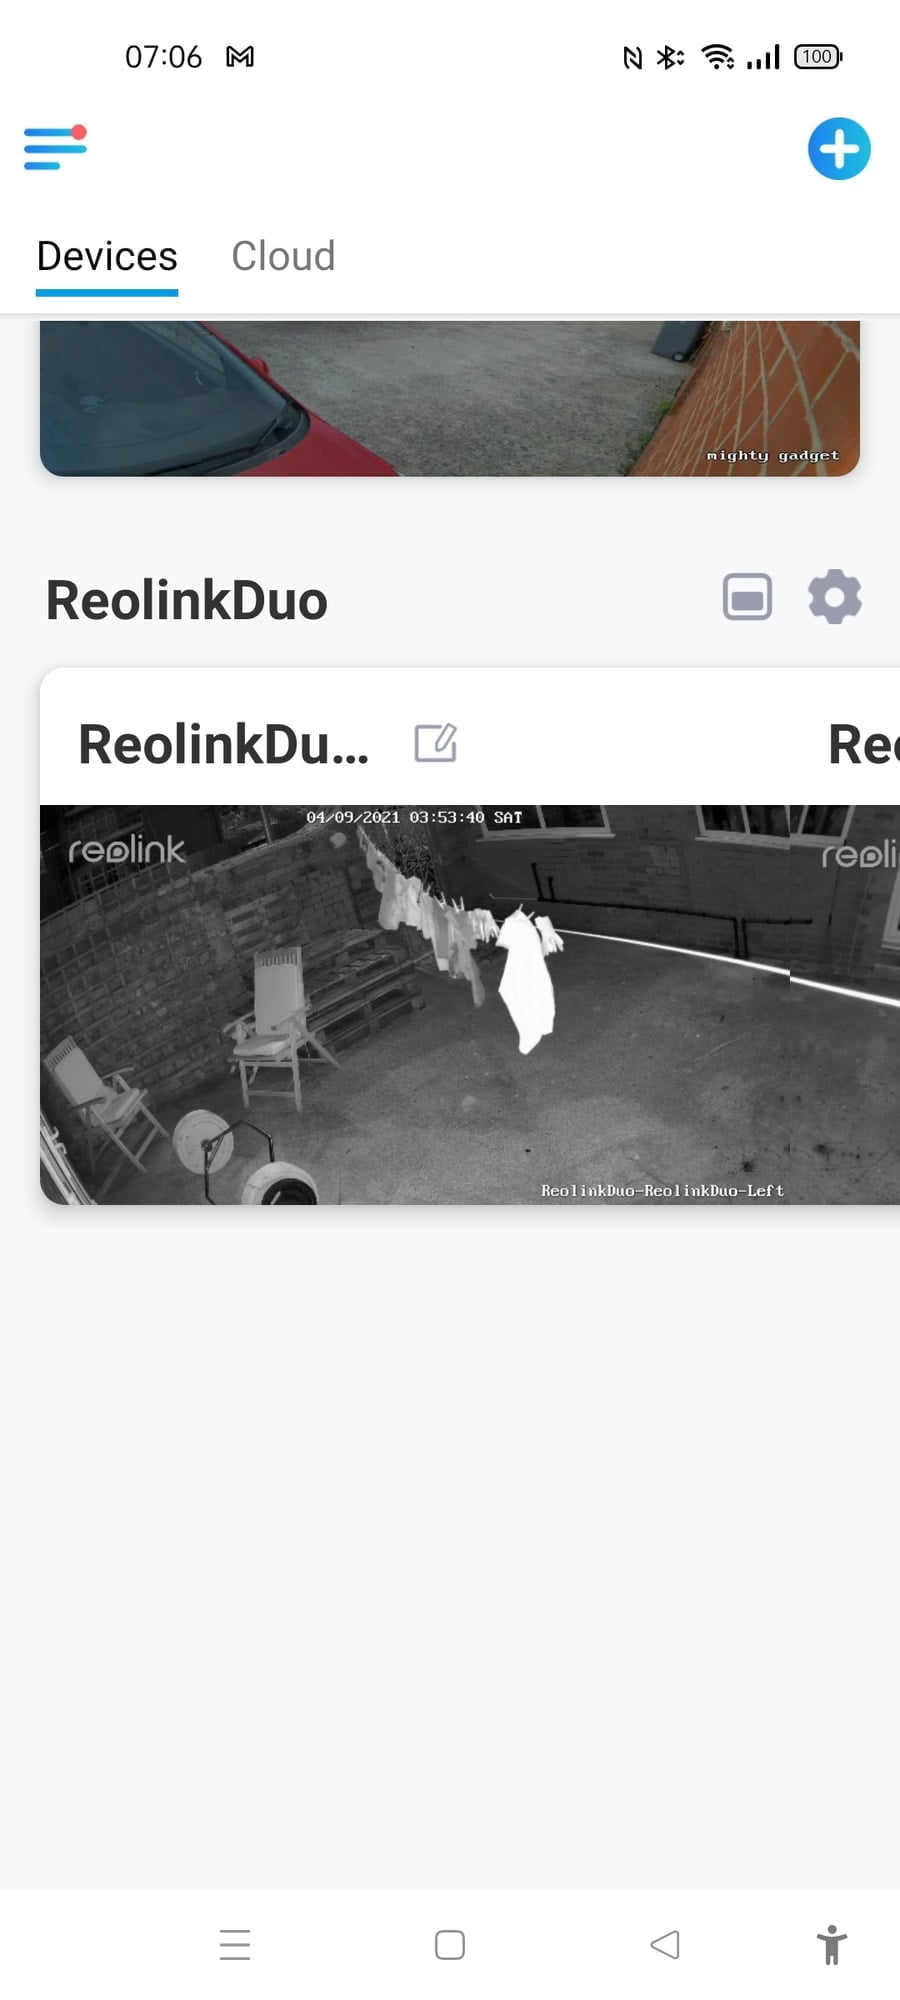
Set-Up – Reolink Mobile & Windows App
Setting the camera up within the Reolink app is identical to every other Reolink camera I reviewed. You power up the camera, scan the QR code then provide an admin user and password. I did have some issues with the connection at first, and assigning the admin password. I suspect this was me being impatient waiting for the camera to connect to the network properly or possibly networking issues on my LAN.
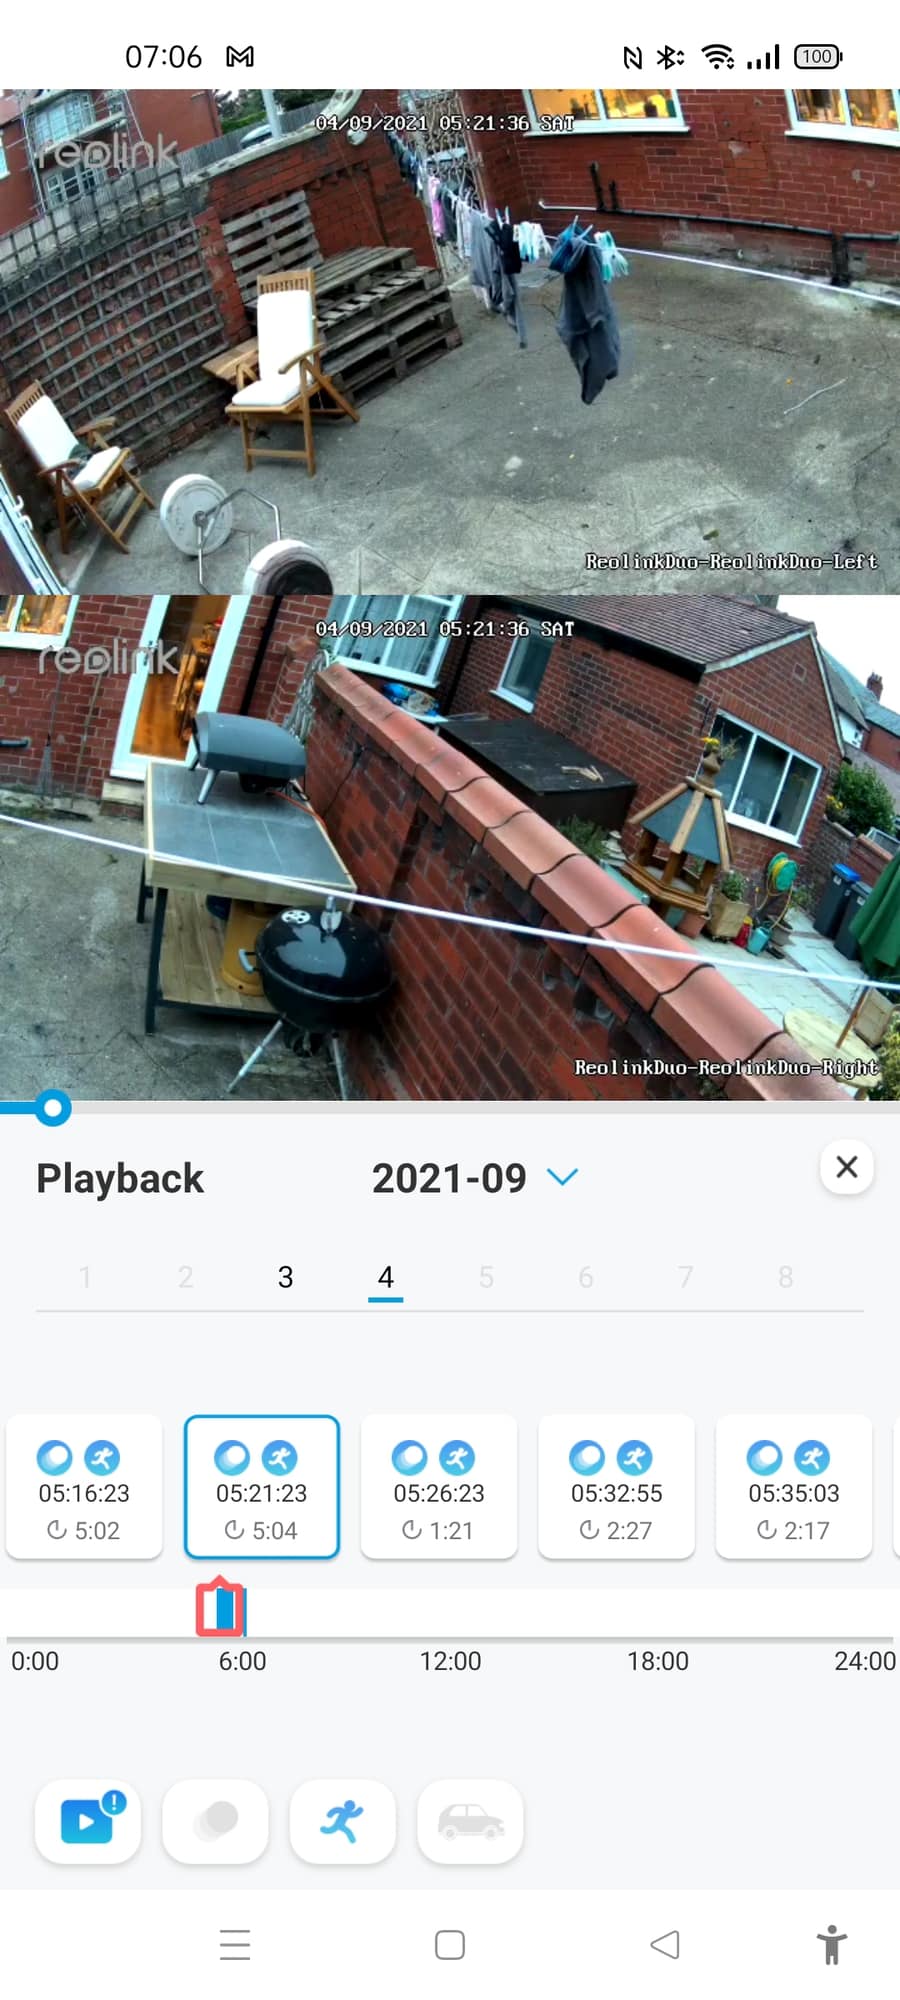
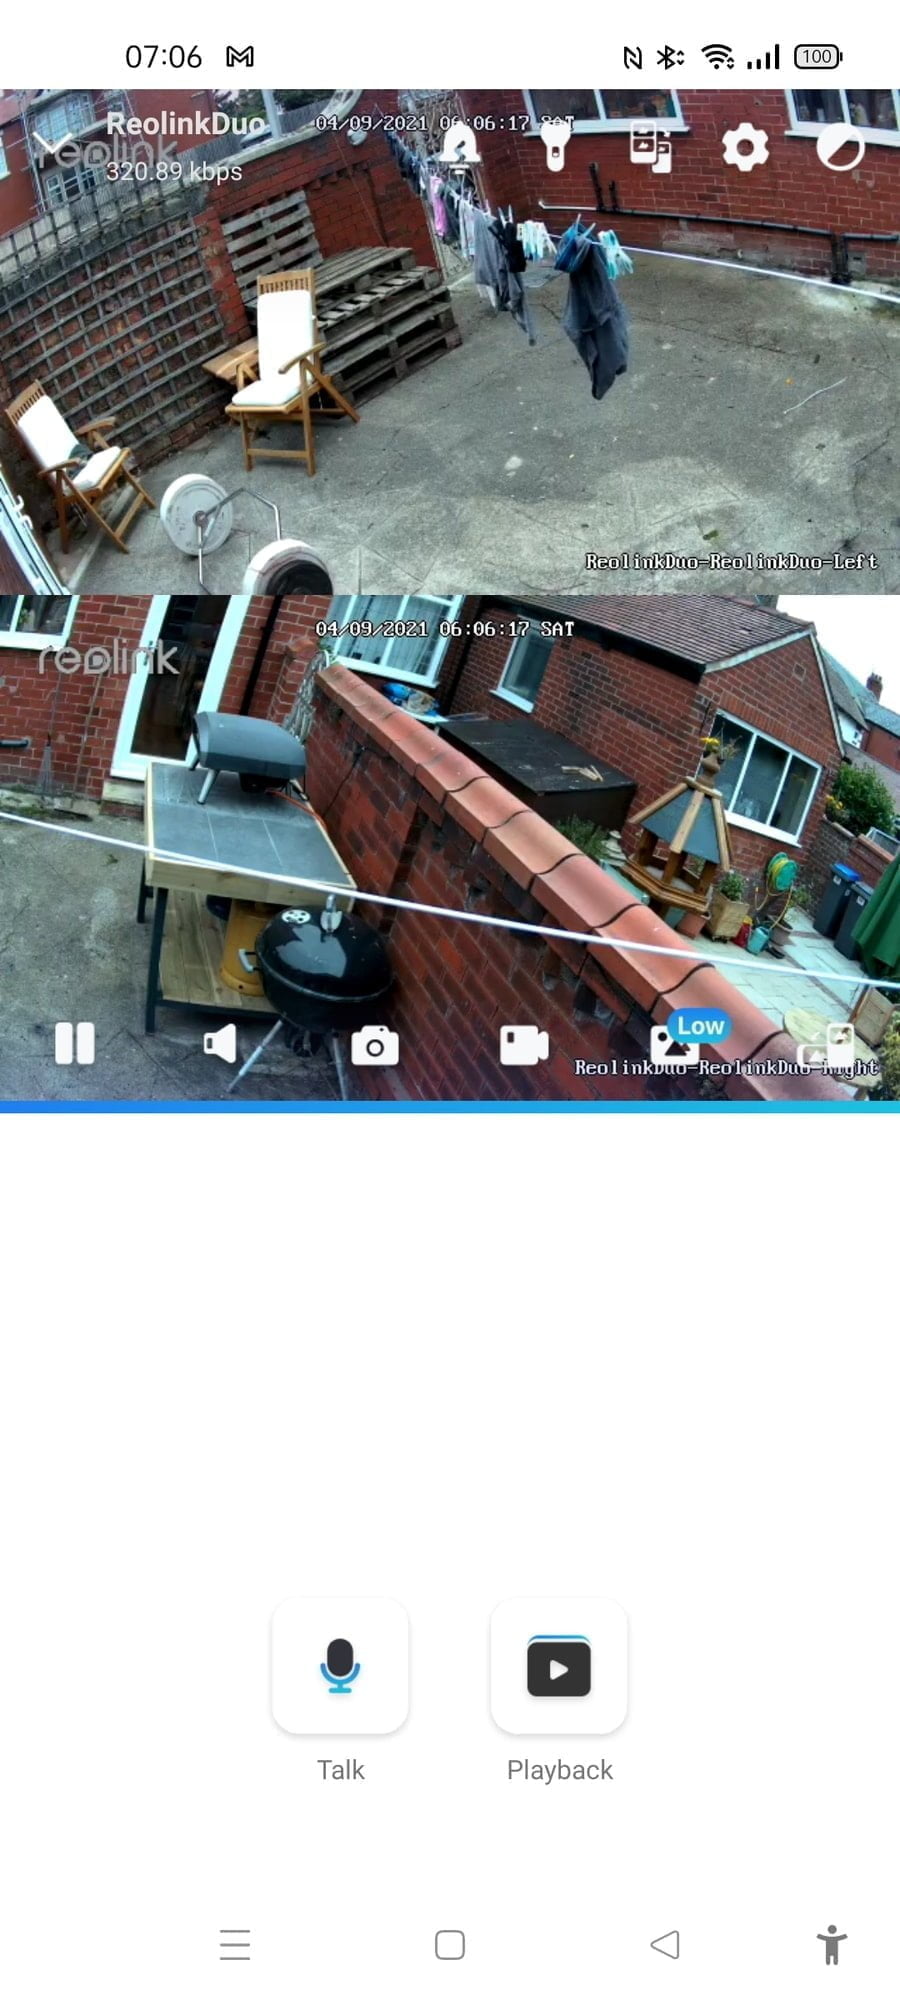
Within the app, the two channels show under the single-camera name, and you can then have it display stitched together or separated as two channels.
When you load the feed in portrait mode in the stiched mode, the two images will display above and below each other. Switching to landscape will place them side by side, giving you an ultra-wide view of your property. The alignment of the cameras isn’t 100% perfect, but it is close.
I previously stated the Reolink windows app can’t stitch the images together. While this is technically true, you can display multiple channels at once. Using 4 channels and displaying them side by side has the same stitching effect I wanted to achieve.
Reolink NVR
With the Reolink NVR, I had to update the firmware to a version that my press contact supplied. Without this, the NVR would only add the left channel rather than both. You also need to have two channels free to be able to add it.
Blue Iris
Blue Iris took me a little while to work out. Similar to the NVR, by default, it just added the left camera. I assume that what you use the auto-detection, Blue Iris finds the first URL then gives up.
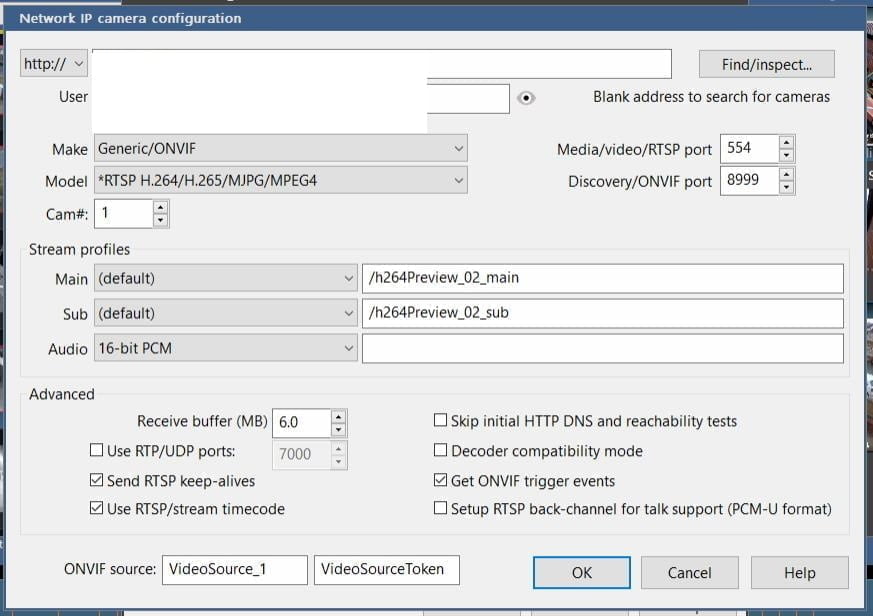
So you need to manually define the second channel, which is the right image. This would be:
Channel two on the right: /h264Preview_02_main
Channel one on the left should get auto-detected: /h264Preview_01_main
Whist your at it, you can also define the substream settings to reduce CPU load. This would be:
- Left side / Channel 1 is : /h264Preview_01_sub
- Right side / Channel 2 is : /h264Preview_02_sub
Performance
Like most of my other reviews, the camera is placed on my windowsill, avoiding me having to climb up ladders and drill more holes in the wall. This causes a few small issues, with it using two cameras with a spotlight and IR, it was quite difficult to get a good placement where there wouldn’t be glare from the lights hitting the nearby wall or window column. I did end up relocating this camera using the mount in my back garden, and these issues were no longer a problem.
I also left the image settings as default, you can tweak things like the spotlight brightness or if the IR lights should come on or not. Under the display settings, you have various image control settings such as brightness and contrast.
The camera performs exactly as expected from two separate 4MP Reolink cameras. Image quality is good, but you obviously lose a bit of the detail you get from their high-resolution cameras.
With the nighttime recording, the spotlight will switch on when it detects motion. In my sample footage, I haven’t set up motion zones so it triggers passing cars quite frequently. This highlights a small issue with the Reolink colour night vision system, a car passing by can almost leave the field of view by the time the spotlight is on, and the video is in colour. Not a massive issue unless you have a particular desire to record fast-moving traffic.
Page 2 has the sample footage, motion detection, price/availability and my overall opinion.
I am James, a UK-based tech enthusiast and the Editor and Owner of Mighty Gadget, which I’ve proudly run since 2007. Passionate about all things technology, my expertise spans from computers and networking to mobile, wearables, and smart home devices.
As a fitness fanatic who loves running and cycling, I also have a keen interest in fitness-related technology, and I take every opportunity to cover this niche on my blog. My diverse interests allow me to bring a unique perspective to tech blogging, merging lifestyle, fitness, and the latest tech trends.
In my academic pursuits, I earned a BSc in Information Systems Design from UCLAN, before advancing my learning with a Master’s Degree in Computing. This advanced study also included Cisco CCNA accreditation, further demonstrating my commitment to understanding and staying ahead of the technology curve.
I’m proud to share that Vuelio has consistently ranked Mighty Gadget as one of the top technology blogs in the UK. With my dedication to technology and drive to share my insights, I aim to continue providing my readers with engaging and informative content.


The new Reolink dou how much in Australian dollars ..cheers
Sorry, I don’t know, they have only published a guide price and in US dollars – I don’t even know the UK pricing.
I was having issues with the connection going in and out with this method. After playing around with it a bit I found out you can also use the Reolink settings and it fixed my issue:
Make: ReoLink
Model: *RLC-410/411/420………
Stream Profile Main:
Left Camera
/bcs/channel0_main.bcs?channel=0&stream=0&user={id}&password={pw}
Right Camera
/bcs/channel1_main.bcs?channel=1&stream=0&user={id}&password={pw}
Thank you, this page was very helpful for my installation.
I have just a problem with the lights. When Blueiris trigger a movement it records, but it does not torn on the flash lights.
How i have to configure this in Blueiris?
Thank you